"Honey, you're getting fat" wifey said to me at the dinner table.
Now, saying this would normally land you in front of the mirror, flexing your pecs, abs and biceps, then walking away confidently saying to yourself "Yeah, I still got it".
But she had good reason for saying it - in fact she relished in it.
But she had good reason for saying it - in fact she relished in it.
"Am I really?" I replied excitedly.
My waistline was not increasing in girth, no middle age spread, no man boobs, no implants or body augmentation surgery, alas it was far more exciting than that.
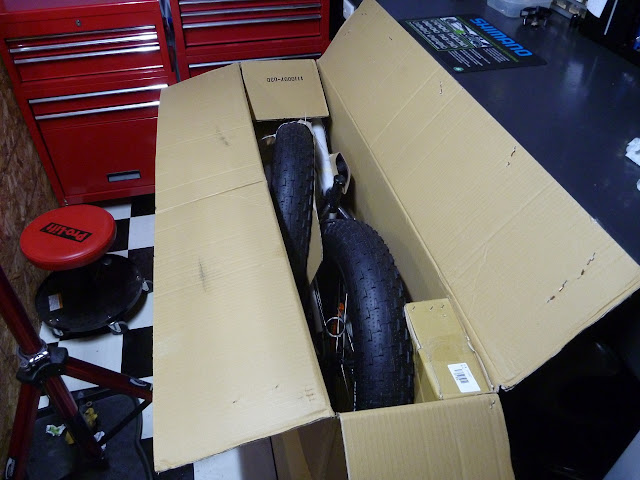
It was time for a new bike to join the family. Not just any bike, it was a fat bike.
The bike arrived in a really, really big bike box. The tyres are 5" wide. I'm more of a function over form kinda guy, but as I was building it, it was triggering synapses in my brain that get excited when I see tactical response vehicles, APCs, podium baja/desert trucks and rockcrawlers.
To quote Tim Allen from Home Improvement " You never really own something, until you've built it with your own hands" argh argh, it was time for me to don the apron and get building.

I built the bike, then road tested it for fit by commuting to work a few times and doing a river loop ride with the shop bunch. Turned a lot of roadie heads, and was great to have it on display in the shop as a talking point for customers.
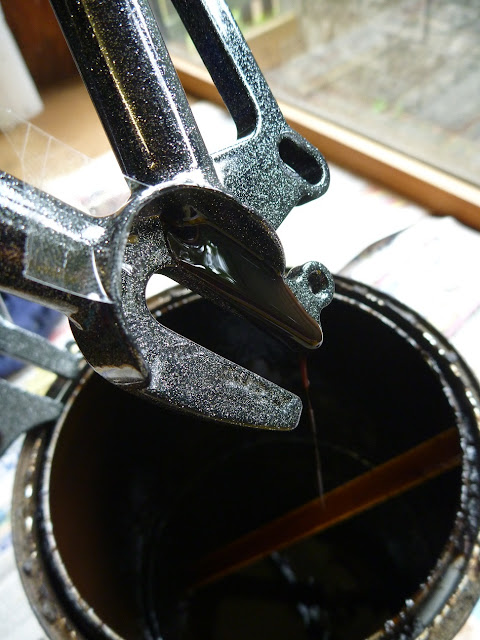
We've got quite a few trips planned, many of them on the beach and in harsh environments, and being a steel frame and fork it needed to be treated where the paint don't go - inside the tubes. I've rustproofed plenty of my 4wds for beach work, so to keep the duco pretty and the frame rust free internally it was time to do the same. Tear down bike to bare frame.

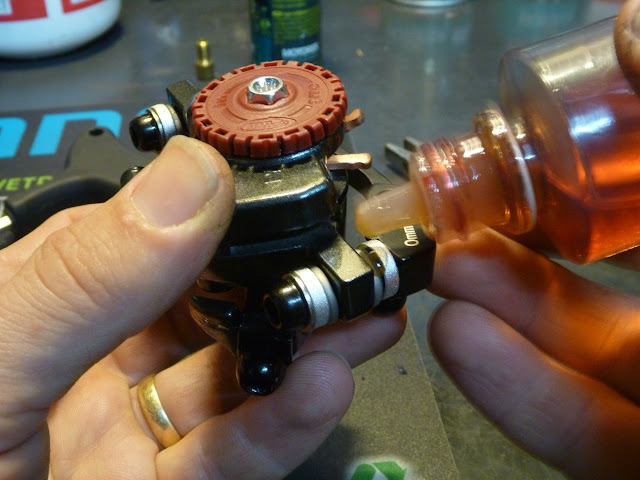
Process and product the same, coat all exposed steel surfaces with cavity wax, I've used fish oil with success too, but takes a long time to cure and weeps forever.

Frame tubes have holes either internally or externally, they allow water, air and contaminants into the frame and that's where the rust process begins. I cover one of the holes on each tube with tape, then flood the tube with cavity wax from the other end, slosh it around, drain the excess and let it cure. It's a long process but essential. I let the wax flash off for a week or so, then cover all external holes with white electrical tape to keep contaminants out.

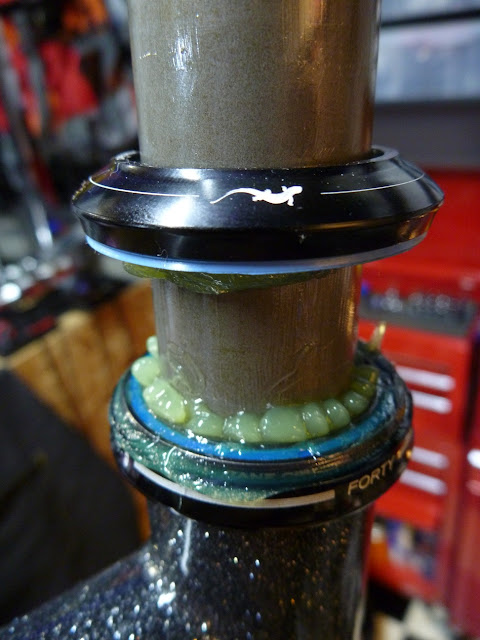
Also the exterior gets a few touch ups, the underside of the cable lugs gets very little paint from the factory, so a good idea to go over these areas with a few coats.

When I build a bike there are a lot of little touches to ensure longevity and reliability. A few of these needed to be carried out given the type of bike and the terrain to be covered. First off was adding a drain hole to the BB shell, tapping it M5 and adding a drain bolt.
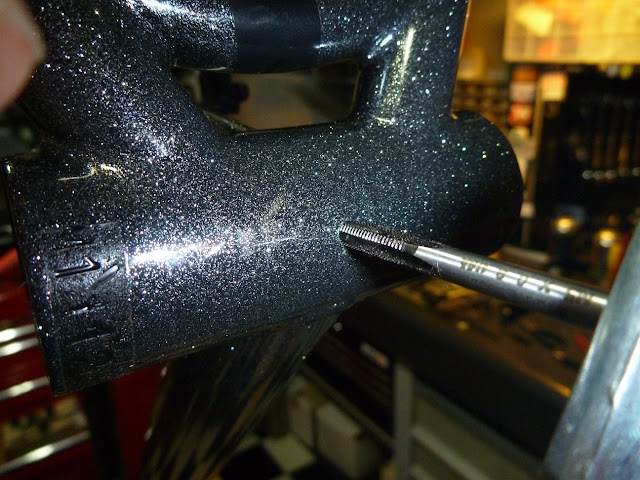
The BB shell faces weren't parallel or clean, so a face and chase was next.

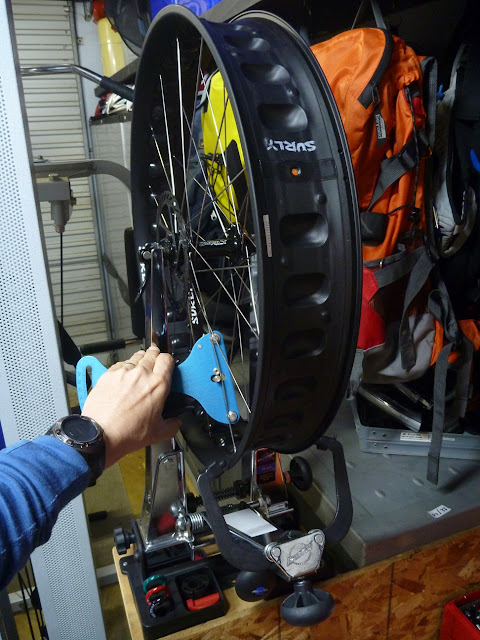
The spoke tensions weren't up to spec, a quick email to Bob at Surly confirmed 1200N/120kg for standard/drive and 1100N/110kg for offset side. Clown Shoe only just fitted in the Park truing stand with mm to spare.

Lots of lube. I like heavy oil on CPS hardware, assists with alignment and helps prevent corrosion freezing them in place.
Grease it, torque it, tune it. Replaced the phosphor black bolts on the cranks and stem with shiny stainless steel units.


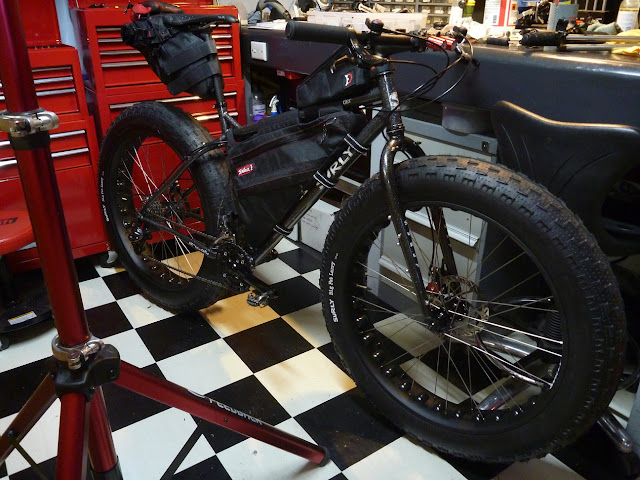
Built up again, with a Revelate framebag (borrowed from the Fargo until my next order), Viscacha seatpack with Spocket, and Gastank bag. Applied some tough polyester tape under the framebag straps.

When I build a bike there are a lot of little touches to ensure longevity and reliability. A few of these needed to be carried out given the type of bike and the terrain to be covered. First off was adding a drain hole to the BB shell, tapping it M5 and adding a drain bolt.

The BB shell faces weren't parallel or clean, so a face and chase was next.

The spoke tensions weren't up to spec, a quick email to Bob at Surly confirmed 1200N/120kg for standard/drive and 1100N/110kg for offset side. Clown Shoe only just fitted in the Park truing stand with mm to spare.


Lots of lube. I like heavy oil on CPS hardware, assists with alignment and helps prevent corrosion freezing them in place.

Grease it, torque it, tune it. Replaced the phosphor black bolts on the cranks and stem with shiny stainless steel units.


Built up again, with a Revelate framebag (borrowed from the Fargo until my next order), Viscacha seatpack with Spocket, and Gastank bag. Applied some tough polyester tape under the framebag straps.

No comments:
Post a Comment